Comparison · 2 picks
Best Podcast Microphone UK (2026)
Affiliate disclosure: we may earn a commission when you buy through links on this page, at no extra cost to you. Our verdicts are our own and are not influenced by compensation. As an Amazon Associate I earn from qualifying purchases.
Podcast listeners will forgive a lot, but not bad sound. A show recorded on a modest microphone in a treated corner beats one recorded on an expensive microphone in a bare, echoey room, every time. That is the honest starting point, and it is why the two picks below split along a single line: how much noise and echo your recording space has.
Both microphones are widely sold in the UK and neither is a niche studio purchase. Selections draw on manufacturer specifications, UK retail listings and independent published reviews. Linked prices update automatically.
At a glance
All 2 options side by side.
 Shure MV7+ Shure MV7+ |  RODE NT-USB+ RODE NT-USB+ | |
|---|---|---|
| Price | See price | See price |
| Best for | The untreated-room pick. | The quiet-room pick. |
| Review | Read review → | Read review → |
| Buy |
The picks in detail
Shure MV7+
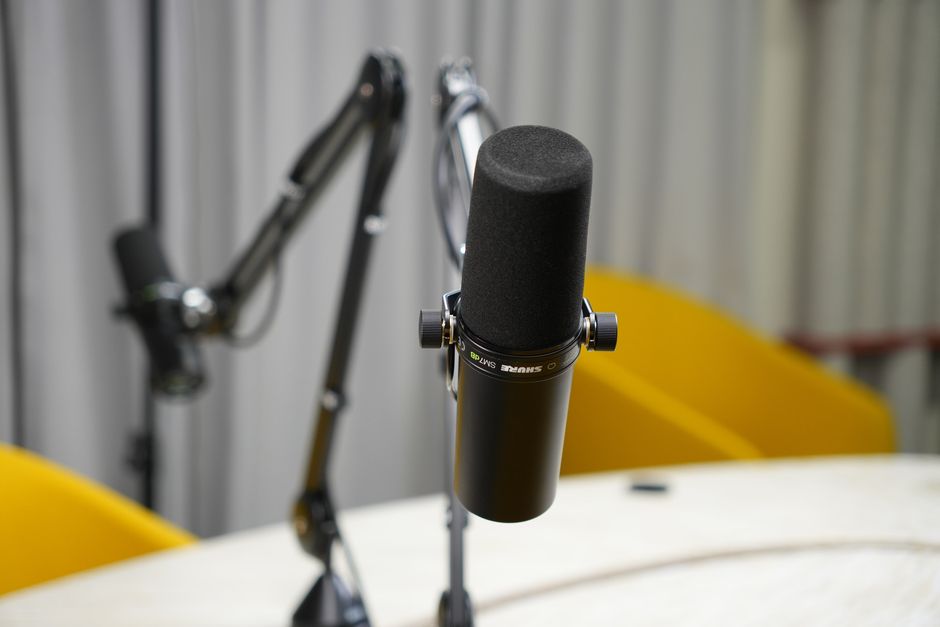
Bottom line. The untreated-room pick. A hybrid dynamic microphone with both USB-C and XLR outputs, so it works plugged straight into a laptop today and into an interface later. Being dynamic, it hears you and comparatively little of the room, and Shure's onboard auto level mode, real-time denoiser and digital popper stopper mean early recordings tend to sound finished rather than raw. The safest choice for a normal spare room.
Pros
- Dynamic cardioid capsule rejects room noise far better than typical USB condensers
- USB-C and XLR outputs let the same mic grow from desk setup to studio mixer
- Auto Level Mode and the digital pop filter make recordings usable with no post-processing
- Settings persist on the device, so it works on any computer without Shure's software
- All-metal build with an integrated yoke for standard mic arms
- Works with phones as well as computers (iOS 16+ / Android 12+)
Cons
- All DSP features (denoiser, auto level, reverb) switch off when using the XLR output
- Premium pricing versus comparable USB dynamic mics
- No stand or boom arm in the box
- USB output sounds slightly more congested in the mids than the XLR path, per Podcastage's test
- Needs close-talking, like any dynamic podcast mic
RODE NT-USB+
Bottom line. The quiet-room pick. A USB condenser with a detailed, present sound, onboard APHEX processing and zero-latency headphone monitoring, supplied with a pop filter and desk tripod. Superb in a soft, quiet space. As a condenser it captures more of the room than a dynamic does, so it is the less forgiving of the two if your recording space is bare or noisy, and it is USB only.
Pros
- Rich, full vocal sound with strong presence - reviewers rate it above the Blue Yeti class
- Revolution Preamp delivers very low self-noise for a USB mic
- On-board APHEX DSP (compressor, noise gate, exciter) processes audio without taxing the computer
- Zero-latency headphone monitoring with a proper mic/playback mix dial
- Included pop filter and desktop stand make it complete out of the box
- Works with phones and tablets as well as computers
Cons
- No on-mic gain control or mute button - level changes happen in software
- A cardioid condenser picks up more room noise than a dynamic podcast mic in untreated spaces
- Costs more than most single-purpose USB mics
- No XLR output - committed USB-only design
Which podcast microphone should you buy?
Buy the Shure MV7+ if you record in an ordinary room: a spare bedroom, a home office, a corner of the living room. It is a dynamic microphone, so it hears mostly what is directly in front of it and comparatively little of the traffic outside, the fridge, or the hard walls around you. Shure's onboard processing adds auto level mode, a real-time denoiser and a digital popper stopper, all of which mean a first recording tends to sound finished rather than raw. It also carries an XLR output alongside USB-C, so the microphone survives the day you outgrow recording straight into a laptop.
Buy the RODE NT-USB+ if your room is quiet and reasonably soft: carpet, curtains, soft furnishings, no washing machine on the other side of the wall. As a condenser it resolves more detail in a voice, which reads as clarity and presence. That same sensitivity is the catch, because it also resolves the room. Put it in a bare box room and it will faithfully record the box room.
If you are not sure which describes your space, clap once and listen. A short, dead thud means either microphone will work. A ring that hangs in the air for a moment means take the dynamic.
Dynamic or condenser: the choice that decides everything else
A dynamic microphone works by moving a coil in a magnetic field. It takes real sound pressure to move that coil, so quiet things a short distance away - room echo, a computer fan, a conversation downstairs - barely register. This is why dynamics are the standard in broadcast studios and why almost every radio photograph you have seen features one.
A condenser microphone works by measuring tiny changes in charge across a thin, powered diaphragm. It needs far less energy to respond, so it captures more of the fine detail in a voice. It also captures more of everything else. In a treated studio that sensitivity is the whole point; in an untreated room it is a liability.
There is no quality ranking here, only a fit. A condenser is not a better microphone than a dynamic, any more than a telephoto lens is better than a wide angle. The question is only ever what you are pointing it at, and what is behind you.
USB, XLR, or both?
A USB microphone plugs straight into a computer or phone and contains its own preamp and converter. There is nothing else to buy and nothing to configure, which is why almost every podcast starts here.
An XLR microphone outputs analogue audio and needs an audio interface or mixer to get into a computer. That adds cost and a box on the desk, but it buys two things worth having later: your choice of preamp, and a straightforward path to recording several people onto separate tracks.
The practical answer for a new podcast is USB now, with XLR available later. That is exactly what the hybrid Shure MV7+ offers, and it is a large part of why it is the safer first purchase of the two. The RODE NT-USB+ is USB only, which is not a flaw so much as a scope: it is built to be excellent at the thing it does rather than to grow into a rack.
Multi-person shows are the one case where this decision arrives early. Recording two people on one USB microphone means one shared track with no way to fix one voice without touching the other. If your format is a regular two-hander in the same room, plan for two microphones and an interface from the start, or look at clip-on wireless systems instead.
Your room matters more than your microphone
The most common upgrade path in podcasting is the wrong one: buy a better microphone, hear the same echo, buy a better microphone again. Echo is not something a microphone can remove, because by the time the sound reaches the capsule the reflections are already part of it.
Reflections come off hard, flat, parallel surfaces. Bare walls, a window opposite a wall, a desk, a laminate floor. Softening those surfaces does more for a recording than any microphone in this price range. In rough order of return: something soft on the floor, something soft on the wall you face, curtains over glass, and a bookcase or wardrobe to break up the wall behind you. A duvet on a clothes rail behind the microphone is a genuinely effective trick and costs nothing.
If you would rather do it properly, our guide to acoustic panels for an echoey home office covers where panels actually need to go, which matters far more than how many you buy.
What else a podcast microphone needs
A microphone on a desk stand picks up every keyboard tap and every knock of the desk. A boom arm gets it off the surface and, more usefully, lets you put it where your mouth actually is rather than making you lean. It is the accessory that changes recordings most.
Shock mounts isolate the microphone from vibration travelling up the stand. Pop filters tame the blast of air on hard consonants; both microphones here have some pop protection built in, but a physical filter still helps if you work close.
Closed-back headphones are not optional. Monitoring while you record is the only way to catch a cable buzz, a clipped level or a knocked microphone at the time rather than in the edit. Both picks have a headphone socket for zero-latency monitoring, so you hear yourself with no delay.
For what a complete setup costs once those parts are included, see our first podcast kit under £300, or the fuller breakdown of how much it costs to start a podcast if you are still working out the budget.
Mistakes that make a good microphone sound cheap
Sitting too far away. The single biggest one. A dynamic microphone in particular expects you close - a fist's width or so - and at arm's length it sounds thin and distant while the room gets louder relative to your voice.
Pointing it wrongly. Side-address microphones take sound at the front face, not the top. Speaking into the top of a side-address microphone is a surprisingly common way to record something that sounds muffled for no obvious reason.
Chasing volume with gain. Turning the input up until the meters look healthy raises the noise floor along with your voice. Get closer first, then set the gain so normal speech peaks comfortably short of the top.
Recording where the computer is. Fan noise is constant, broadband and almost impossible to remove cleanly. Move the machine, or move the microphone away from it and point the null - the back, on a cardioid microphone - towards it.
Skipping the test recording. Sixty seconds of speech played back on headphones before the guest arrives catches almost everything on this list.